Creating chatbots become easier with the updated builder
We made the chatbot builder more consistent and logical. Earlier, many blocks were hidden in the settings. It was visually unclear how the top menus settings and canvas elements are related and how to set them up.
Now you can find the important settings in separate chatbot builder blocks. These are a detailed list of updates that will help you assemble the chatbot faster:
- All the user touchpoints are visible on the canvas.
- Connection blocks are in the foreground, so you can see what user data we collect and where it can be transferred and stored.
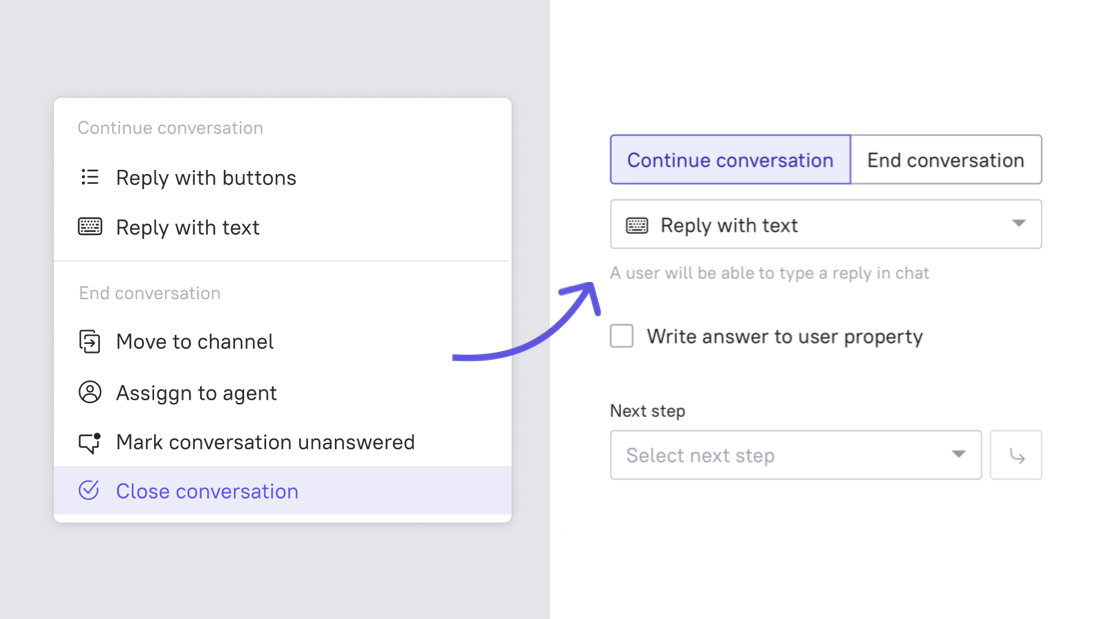
- The entire chatbot flow (from the trigger to the end of the conversation) is on the same screen now. You can quickly make edits or recall what each chatbot does.

Now setting a chatbot is divided into steps. And when you configure something in the settings, it immediately displays visually on the chatbot canvas.
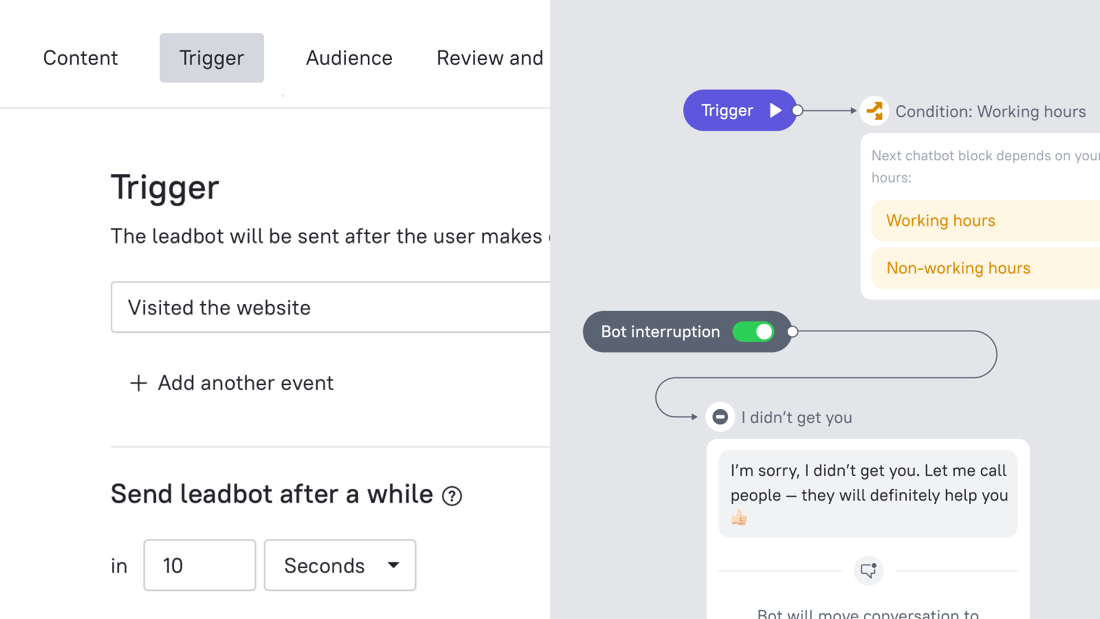
- Configure Trigger event. This block is the first step in a list of settings, as it triggers the chatbot.
2. Create a series of messages. These can be open questions, answer choices, a message linked to the Knowledge Base, etc.
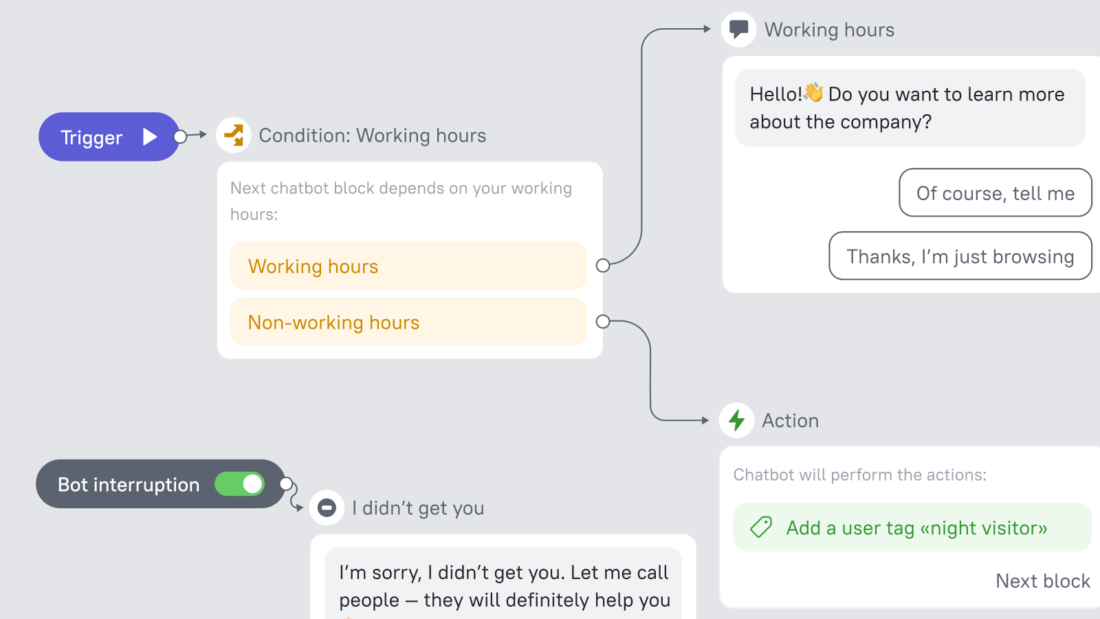
3. Link all messages with actions. We put actions on the canvas so that it is visually clear what will happen when the user responds to the message. For example, “set a tag,” “send user’s email to a lead card,” or your CRM.

4. Set day and night scenarios for the same chatbot. You no longer need to create multiple chatbots to do this. Ask questions, qualify users, transfer conversations to agents during working hours, automatically answer simple questions, and collect contacts when all agents are offline.
The search for the chatbot settings became easier. For example, finding “finish the conversation,” “continue the conversation,” etc., options won’t be a problem.