Lead generation using communication chains
When visitors are on your website it’s the perfect time for you to receive their contact details — Email address or phone number in order to communicate with them further. Show them product value if they don’t catch it from the first glance. This is lead generation — the perfect way to build an email database and widen your funnel. On average lead generation chain like that allows to achieve up to 10% of visitor to lead conversion rate — 10% more people to make your loyal customers.
There could be different scenarios: chat message + email or pop-up + email. Let’s look deeper into this chain and see how to set it up in Dashly to collect leads and widen the funnel.
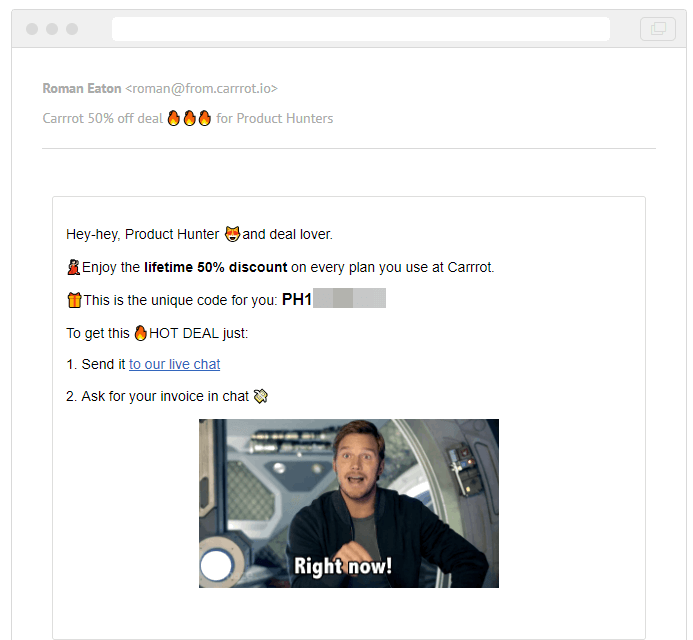
We are going to show you a step-by-step instruction (with all the insides) of how to create effective communication. This example is based on our Product Hunt pop-up+email chain as an example.
 |  |
Create auto message with email collection
First of all, you need to come up with an idea. Your visitors won’t be highly motivated to leave their personal data if they don’t feel the need. You have to motivate them with valuable content or a profitable deal for an effective lead generation. In our Product Hunt pop-up we offered a promo code for 50% discount to our leads. Make an offer with a discount or give visitors a free trial if your product doesn’t have one — this will increase conversion dramatically.
You can use a chat message instead of a pop-up. But if lead generation is one of your main goals — better opt for a pop-up. It’s more noticeable and will definitely be more convertible. You can use chat messages with email collection as an auto-reply when all operators are offline. Read how to set it up here.
So when the idea is ready — it’s time to implement it. Go to the Auto messages section and create a new message.
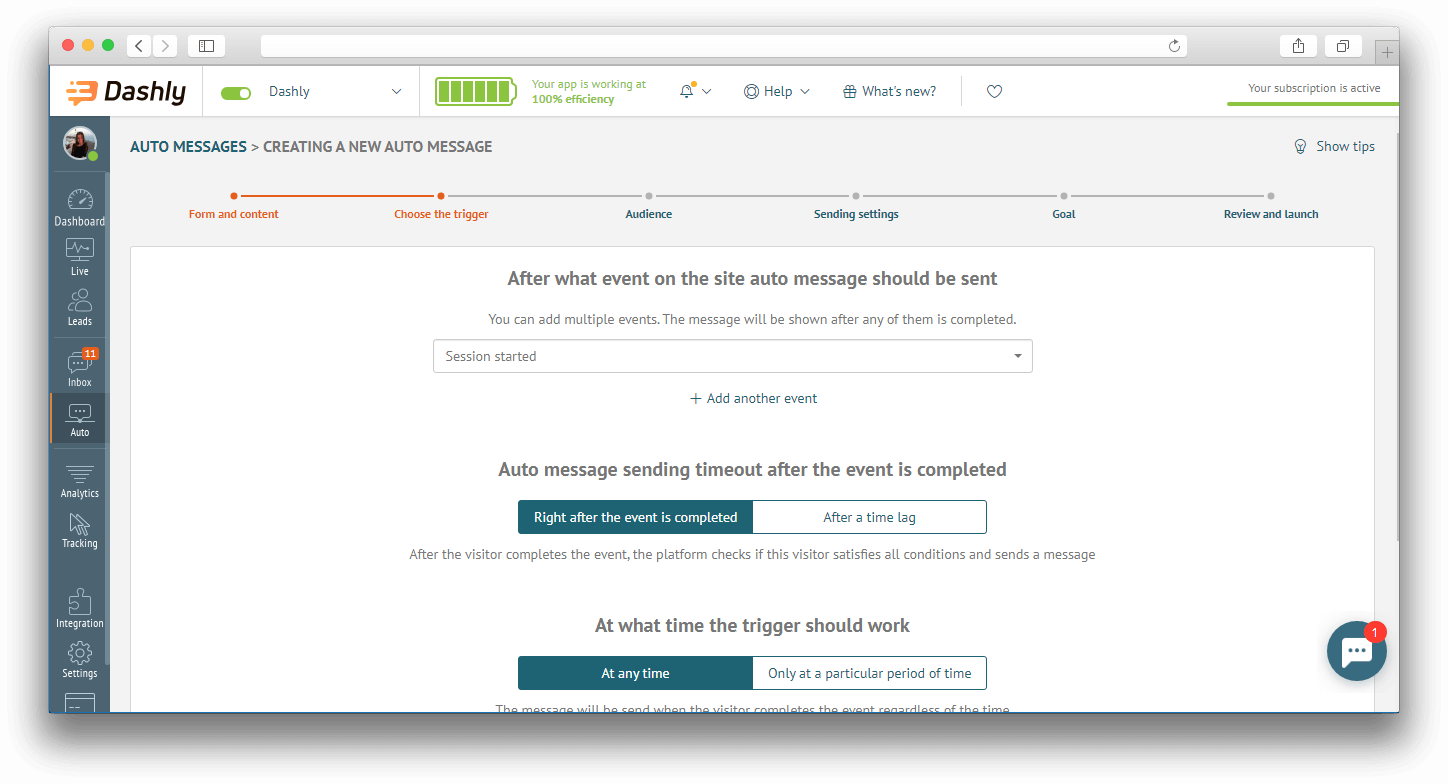
- Here comes the most important thing — choosing a trigger.
Trigger is an event that a visitor has to perform in order to receive your auto message. This choice depends on the idea you had for the communication chain. It can be any kind of event — session started, page visited, page scrolled, etc. (Read more about how to start tracking these events here). For example, for our Product Hunt pop-up chose “Session started” as a trigger. It means that every time a person visits your website he’ll see a pop-up. - If you want your pop-up to be shown right after the event is completed (the visitors opened the website), choose the corresponding setting in the timeout section. We recommend to leave some lag (about 30 seconds) — just choose “After a time lag” and set the time needed.
- If your offer assumes that visitors have to receive the communication only during the night or working hours — choose “Only at a particular period of time” option and set the time needed.
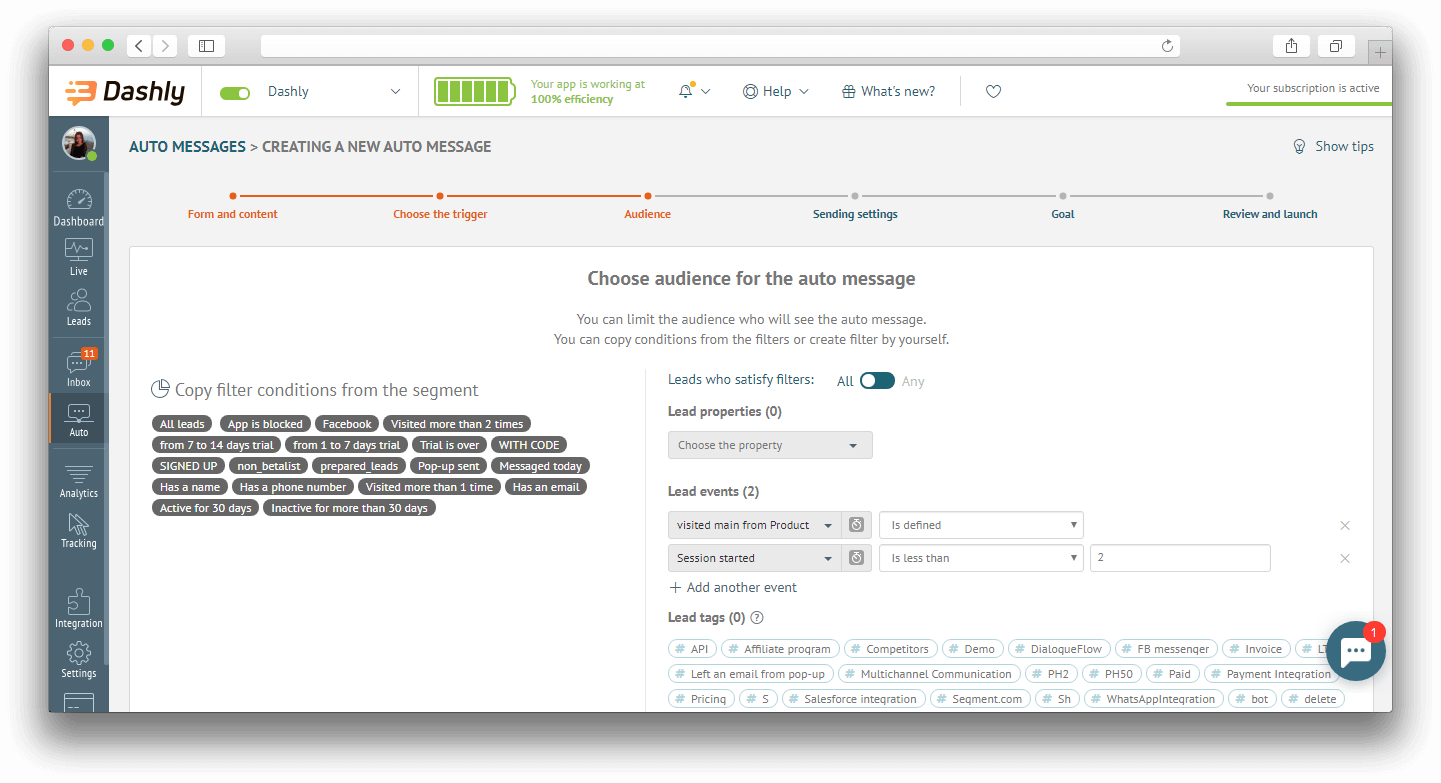
4. Next step is choosing the audience. Here you can select criteria that define visitors and leads to whom your message is going to be sent. Limitations are based on properties and events. For example, you can choose only people from a certain location (New York city only or people from Australia, for example) or those who] are on your website for the first time (“Sessions” is less than 1 in a properties field).
For our pop-up we took only those people who visited our website from Product Hunt less than 2 times:
- Visited main page from Product Hunt (counter) — defined
- Session started (counter) — less than — 2
5. If you want your pop-up to be shown multiple times, just choose the period of time when it will be sent again or set up the “Send only 1 time” option. Don’t forget to put the checkmark below so that you would not resend your message to those who have already replied to it.
6. In case you want to see how this communication affected visitors’ behavior, you can create a control group of people who satisfy the same audience criteria and have the same trigger event made but who won’t receive the message. Then you can compare the results of these two groups (with and without pop-up) and make a decision about this communication.
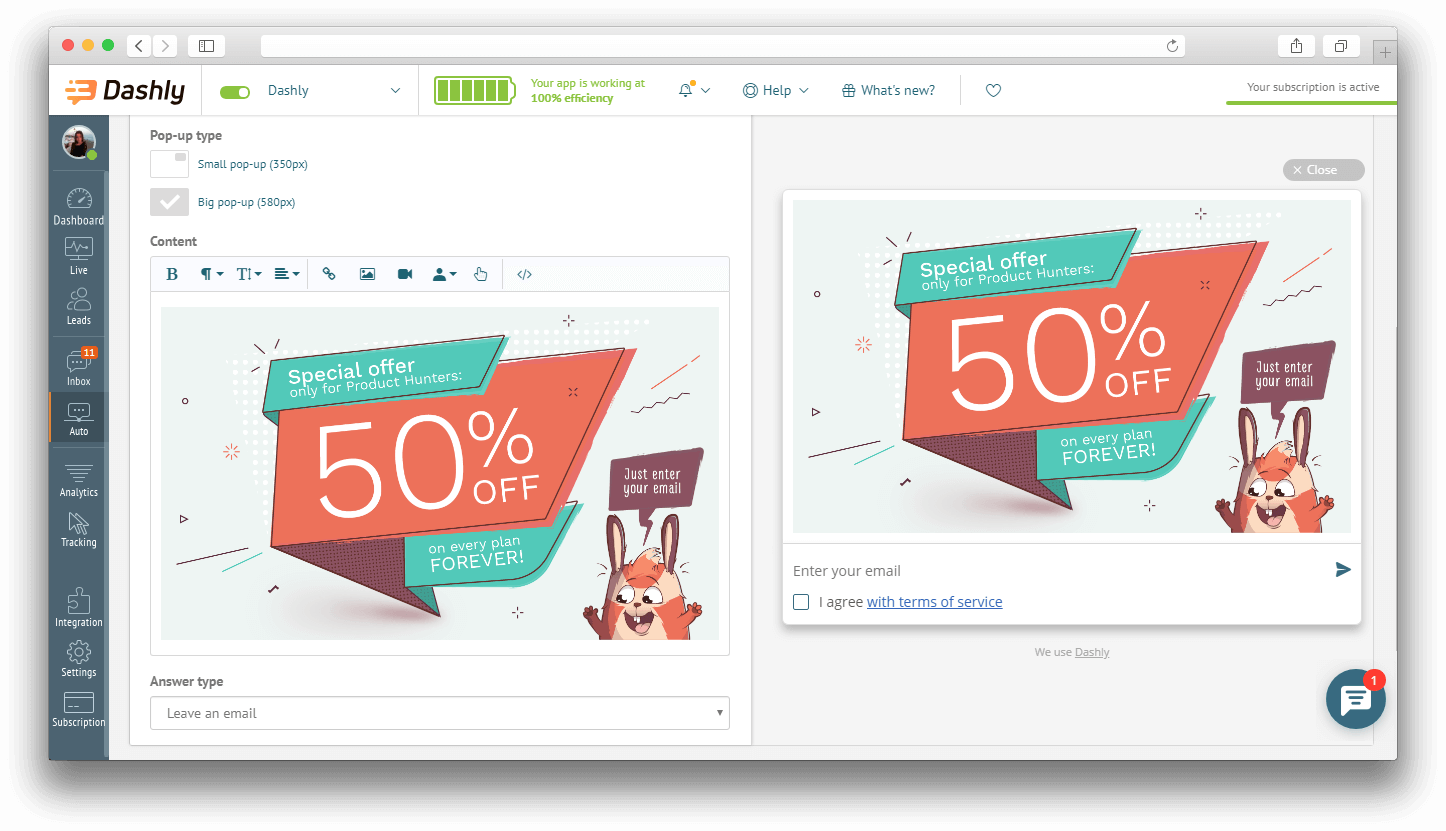
7. We move on to the most interesting part — making the pop-up design. Choose the needed message type (we made a Big pop-up for our Product Hunt message) and don’t forget about the answer type: here we choose “Leave an email” as the answer field.
Add an image, text or even paste your HTML code here and you’ll see the pop-up ready for launch!
8. If you know what you want to achieve with this communication — set up a goal. We put “Email is changed” as a
9. Review your auto message, check all the conditions, launch and enjoy! 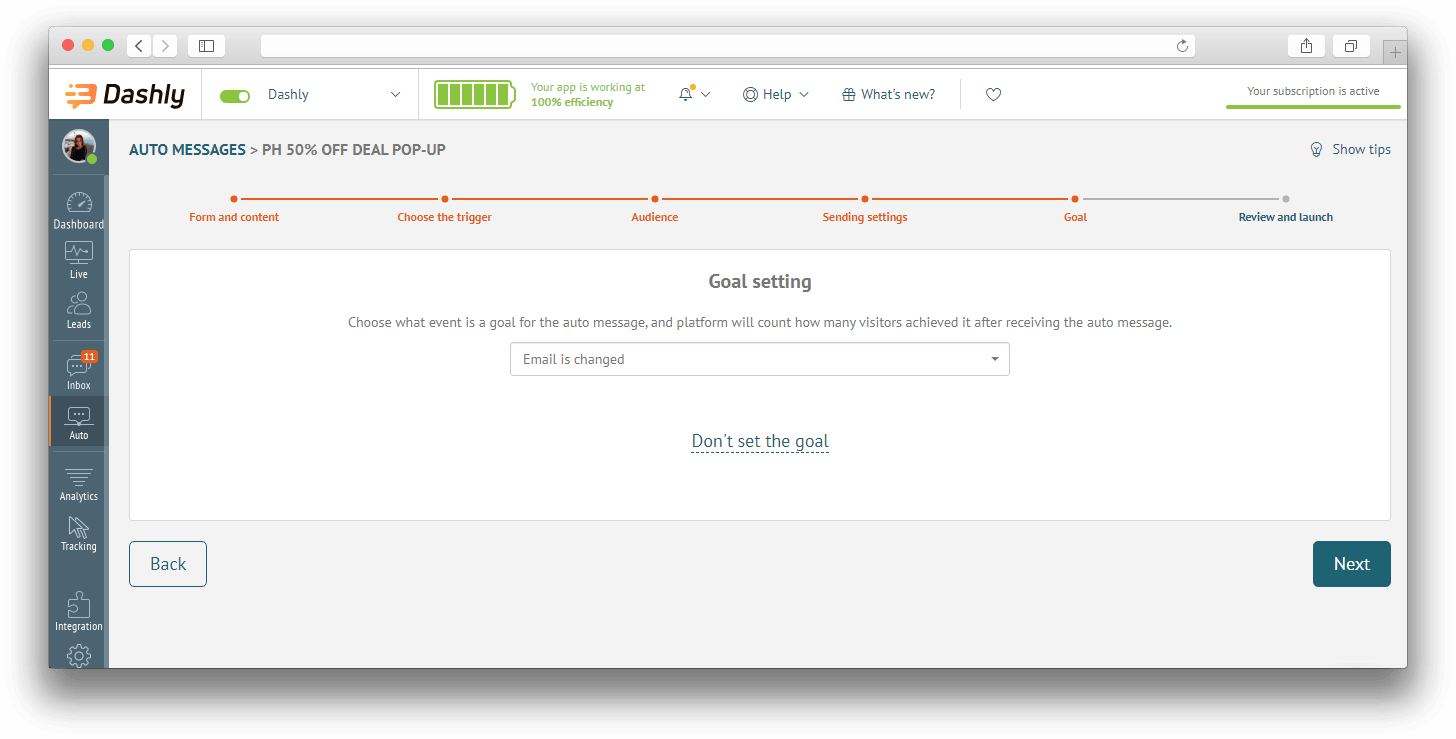
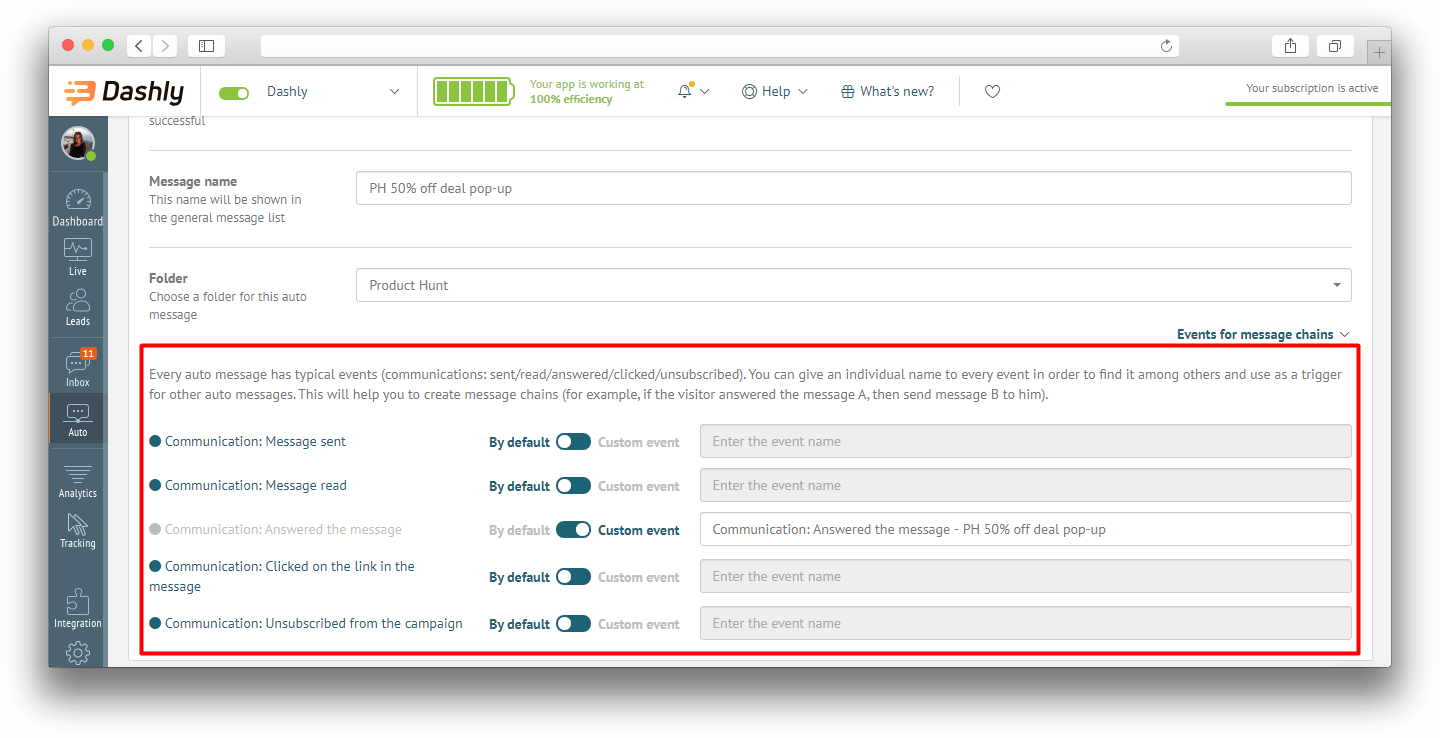
NB! In order to track this pop-up in a communication chain and use this message in funnels — configure its tracking. Go to “Events for message chain” and move the slider where needed.
For our Product Hunt pop-up, we were looking for an email address left. That’s why the answer has been tracked. But if you want to build the whole chain, turn on more events. You can name them consistently or leave defaulted.
Press “Create and launch” button to hit the road with the message immediately or press “Create and launch later” to postpone the debut.
Now you’ve launched your pop-up — congratulations! You are on the way to a bigger lead database and consequently to a greater number of sales. But that’s not the end yet?
Follow up with an email
After your visitors became your leads (as they left their email addresses), it’s the best time to make the first external communication and send them an email.
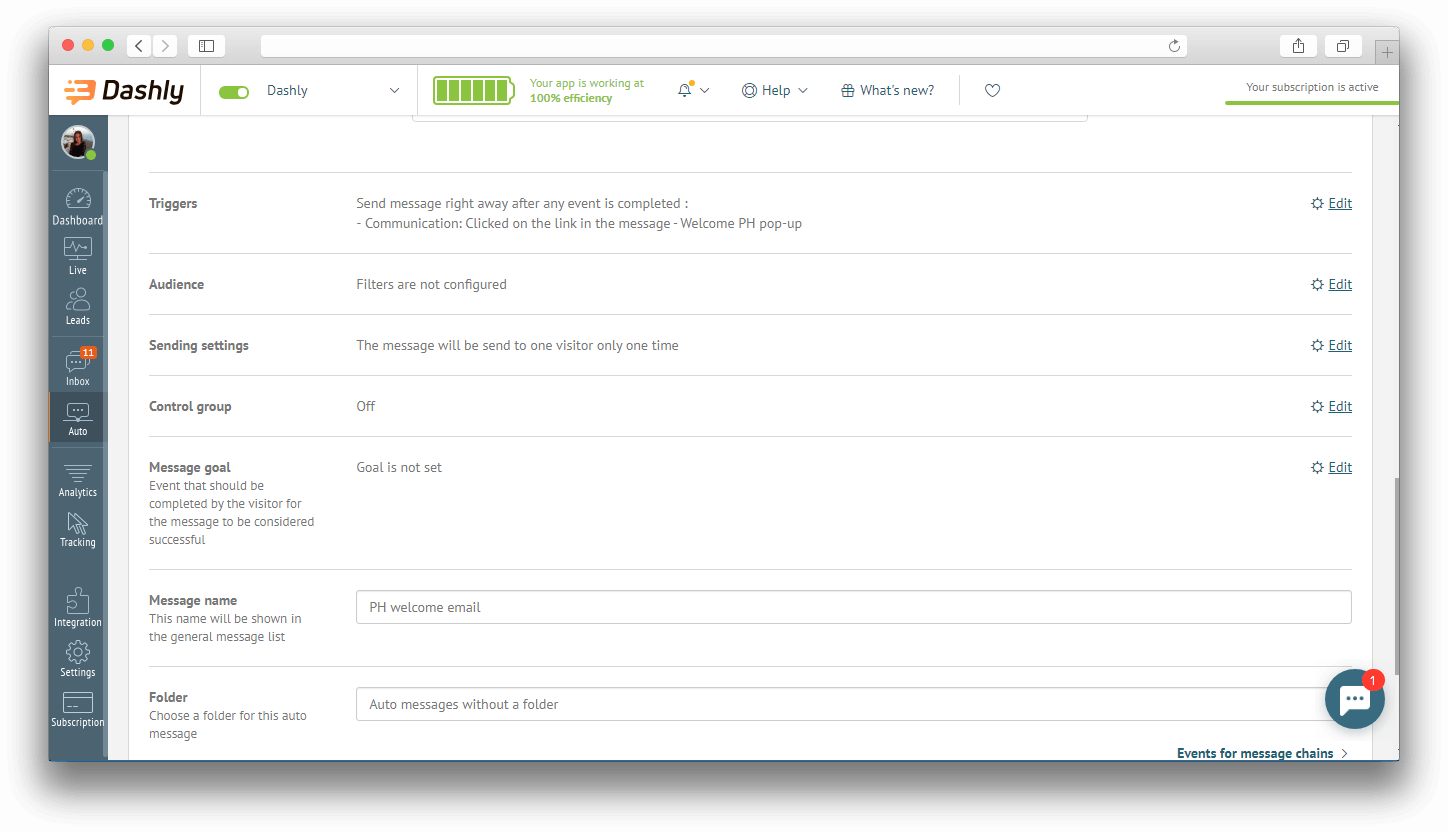
The main principle of creating this auto message is the same. The difference is in the trigger and audience. Email message is the second step in the communication chain, that’s why its trigger will be the answer to a previous communication — pop-up.
Trigger event: remember we created the event “Communication: answered the message” for your pop-up in step 9? Let’s use it here as a trigger.
Audience: you can leave this unconfigured because everyone who had answered the pop-up (left an email address) is supposed to receive the email.
This is how our Product Hunt email was configured.
P.S. you can create an event for a message chain, for example, “Communication: message read” in order to make a funnel.
Look at the analytics
Let’s see what we’ve got! After your campaign collects enough data you can look at the first results.
First of all, you can look at the basic report for every message — pop-up and email separately. Go to the Auto messages section and choose the report for a needed message. There you will see Open, Click and Reply results. That’s what we got for our Product Hunt pop-up. Pretty good results?

But let’s do something more interesting — create a funnel. That is a perfect way to see how your lead generation communication chain worked visually, at what step you are losing most of the visitors and what can be changed to keep them.
Go to the Analytics section and choose Funnels. Let’s create a new funnel and choose the needed events:
- Session started
- Communication: answered the message (here you should choose your pop-up, you’ll see it by its name) — the event we created on the step 9th.
- Communication: message read (here you should choose your email, you’ll see it by its name) — the event we created for email message.
- Then you can choose the event you are expecting your visitors to do after this communication chain. For example, “registration”, “payment success” or “order made”.
This is how our funnel looks like:
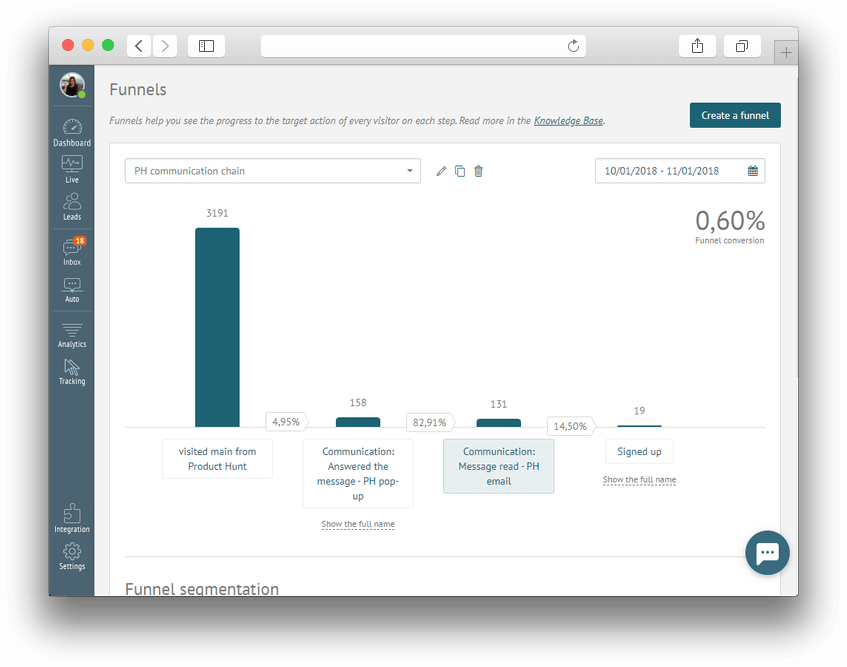
In the funnel you see the conversion in percentage. It will show you how visitors behave and at what step they drop off. As soon as you detect the problem, you’ll be able to take action: reduce the number of registration steps if you see that people start it and don’t finish. Or change the logic of your deal if you see that people are not really willing to leave their email addresses.
The number on the right shows the total conversion from the first step to the last one. So you can see what percentage of your visitors signed up.
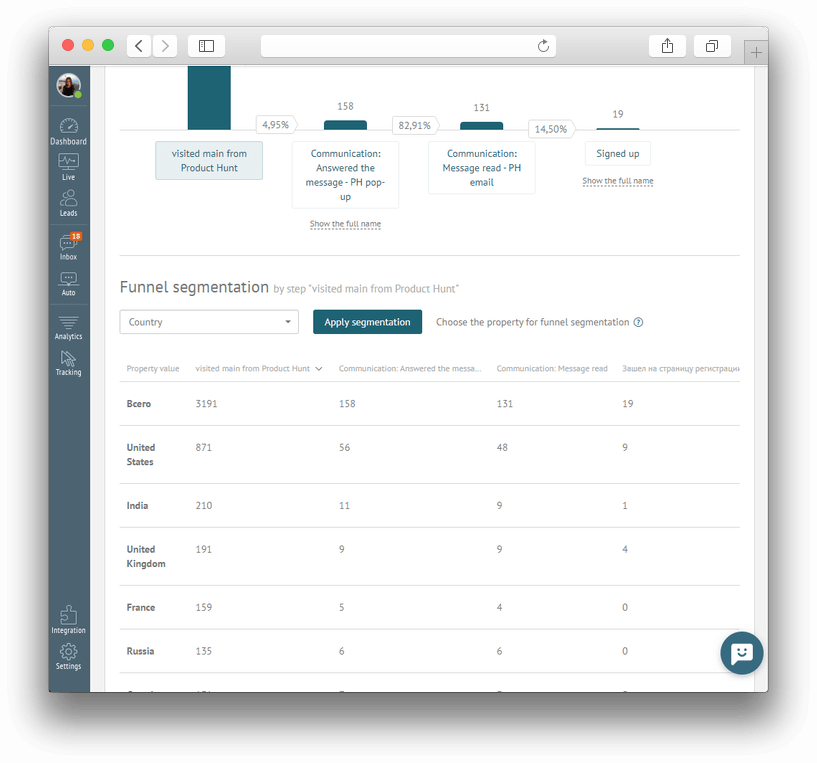
You can also segment every step of the funnel by any property. For example, you can look at the location of visitors on every step or the number of their session. Choose the step of the funnel (just press on the event name) and find a needed property in the dropdown list of Funnel segmentation part.
Summing up
In order to get more leads from your website, follow these simple steps:
- Come up with an idea — your visitors need the motivation to leave their contact details. It may be a discount or some useful content that they will receive in the email.
- Create your pop-up with a field for email address. Don’t forget to make an event for tracking while configuring the message.
- Create
the follow-up email. Look at your analytics and create a funnel to get a clear vision of your campaign effectiveness.
The method we described above is a simple beginning of your lead generation process. To make it effective, you need to understand who your audience is and what they are interested in. Read more about it here. But the main point is that you need to make a good offer to get more emails.
If you have any questions — just write us in chat or leave your comments here.
Good luck!
Read also:
⭐ 2025 Email Sales Funnel Strategies: How to Convert More Leads [11 Examples]
⭐ 6 Smart Tactics to Solve Your Sales Funnel Leakage Problem


![21 proven tools for your 2025 marketing tech stack [Recommended by market experts]](https://www.dashly.io/blog/wp-content/uploads/2022/08/martech-stack-999-720x317.png)

![Top 10 Best Custom Chatbot Platforms for your website [+AI]](https://www.dashly.io/blog/wp-content/uploads/2020/06/cover-1-720x308.jpg)

