Lead capturing: how to collect emails

Capture leads on your website with auto messages — don’t miss a prospect.
Let’s create a pop-up where a visitor can leave an email and receive something in return (an eBook, a toolkit or a special proposal) to their Inbox. It will be a message chain consisting of a pop-up and a follow-up email.
The pop-up we’re going to create will be shown in 30 seconds after a person visits the website (you can play with the time lag and come up with the perfect one for you). The logic will be like this
- A person visits the website,
- Dashly records this event,
- 30 seconds countdown begins,
- If a visitor matches all selected filters by the end of this time period — pop-up is shown,
- The visitors sees the message and leaves an email address,
- The email is automatically added to the lead card and serves as a trigger for a next message
Let’s go step by step to create such a message chain.
1. Creating a triggered pop-up
Let every visitor who comes to your website see this pop-up.
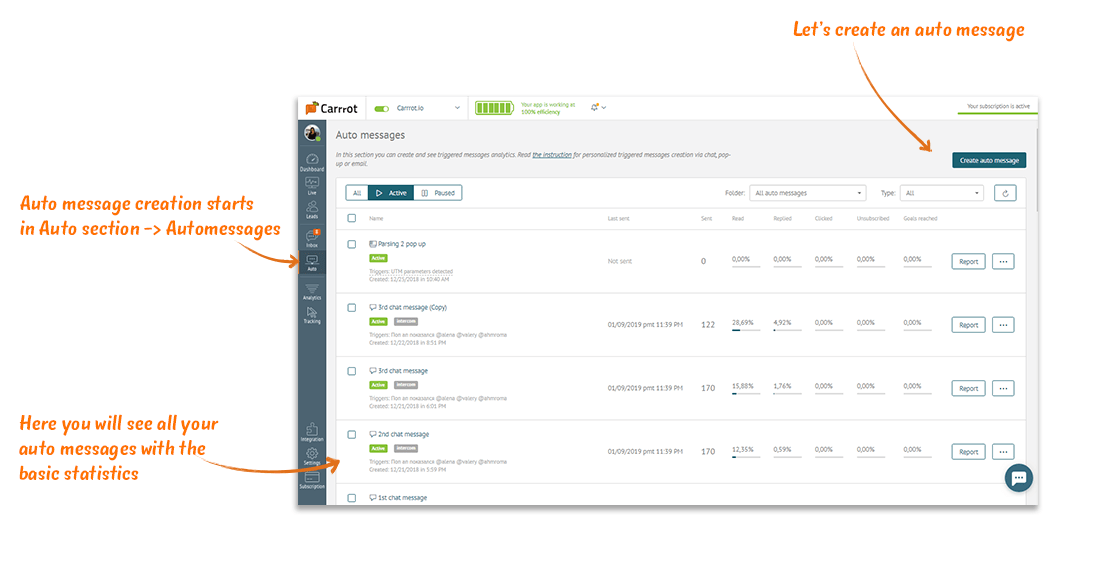
First, go to the Auto section — > Auto messages and create a new auto message.
“Session started” will be a trigger that signals for a pop-up to show up. Put a timeout of 30 seconds to let your visitors walk through a website.
On the “Audience” step you can fix the segment you’re interested in. Here are some examples of segmentation. You can show a pop-up to:
| Those who visited your website more than 2 times | Lead event: Sessions more than 2 |
| Those who came from Product Hunt | Lead property: The first source contains producthunt |
| Those who wrote you in chat | Lead event: Communication: User started a chat conversation is defined |
| Those who didn’t receive any messages during the last week | Lead event: Communication: Message sent date of the last event is more than 7 days |
The more data about your visitors you are collecting, the more specified segmentation you can configure. But “Session started” will be a trigger for this auto message anyways — this event completion sends the auto message. Only Lead properties and events put restrictions on the audience.
By the way, we recommend launching A/B tests and creating control groups. These will help to make better communications and improve conversions. You can create a pop-up for lead collection in Dashly Pop-up builder like that:

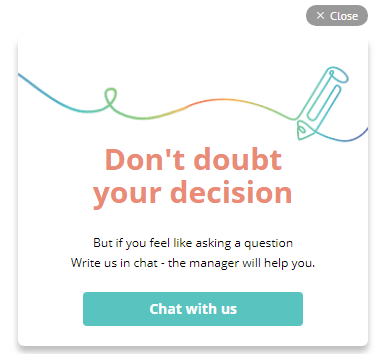
You can offer your visitors to choose: leave their contact data to get a call from your operators or write in chat themselves.
Pop-up may contain one button which opens Dashly chat. In order to do it paste this script into triggered JS (choose the event “button click” as a trigger).
carrrot.open ()
On the last step check all the settings and what your message looks like.
In order to make a message chain or create a funnel later, we need to create events to see how visitors interacted with this specific message. To do so, find “Events for message chains” on the bottom of the page on the last step and choose events needed (all except for “unsubscribed”). You can name these events the way you want, but we recommend keeping one logic for the whole platform. For example, “Communication: Message sent Welcome pop-up”. If you don’t activate events for message chains, you will still see message statistics, but won’t be able to create chains and funnels.
Thanks! The first email is already in your inbox
2. Creating a triggered email as an answer to a pop-up
Create email the same way as a pop-up:
- Form and content — choose “Email” and create your text;
- Trigger — Communication: Message answered Welcome pop-up (or the event you’ve made when creating the pop-up);
- Timeout — right after the event is completed;
- Audience — leave null. Dashly will send an email to everybody who had answered the pop-up;
- Review and launch — check all conditions and don’t forget to activate events for message chains (
to use it further in a funnel) - Form and content — choose “Email” and create your text;
- Review and launch — check all conditions and don’t forget to activate evens for message chains (
to use it further in a funnel).
In order to see all auto-messages of one message chain, put them into one folder. You can do it by choosing needed auto messages in the Auto section or on the last step of configuration.
Every auto message has basic statistics. To see it in more detail, click on the Report button. But in order to understand how the whole scenario worked, how it affected visitors’ behavior, and where are bottlenecks, let’s build a funnel.
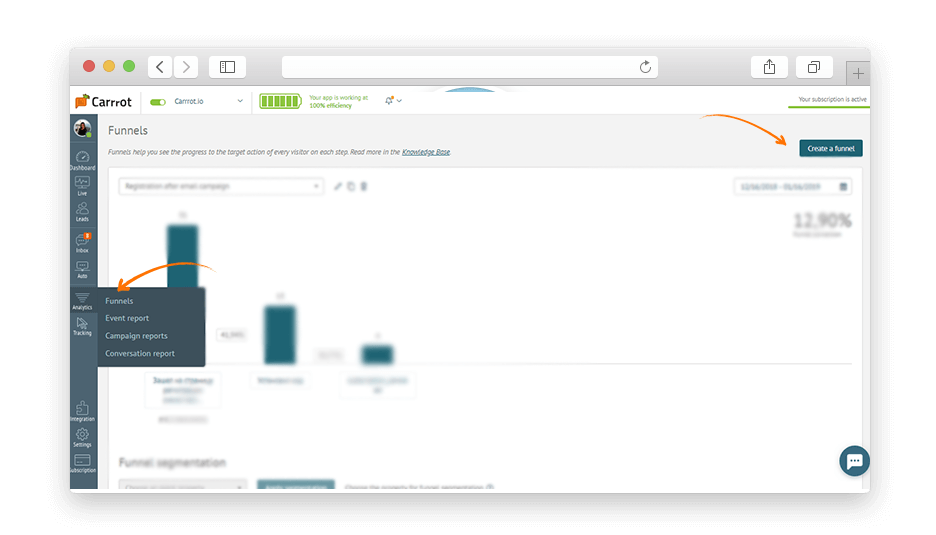
3. Creating a funnel to evaluate message chain effectiveness
Go to Analytics section -> Funnels and click on “Create a funnel”.
Let’s create a funnel based on the following events:
- Session started
- Communication: Message sent Welcome pop-up
- Communication: Message read Welcome pop-up
- Communication: Message answered Welcome pop-up
- Communication: Message sent Follow up email
As a last step of the funnel, choose the target action you expect your visitors to perform: Sent a chat message, Signed up, Booked a demo, etc.
NB: There will be visitors who walked through all steps during the last 30 days in your funnel. If a visitor skipped some step (for example, made steps 1,2 and 4), then they won’t appear in the next steps (in our example, they will be counted in the step 2, but not in steps 3, 4 and so on).
As a result, we have an email lead base in return to some value we’ve provided in the email (ex., sent a book) and looked at the results using a funnel.


![Growth Marketing, o que é? O guia definitivo [explicado por um hacker de crescimento]](https://www.dashly.io/blog/wp-content/uploads/2023/04/The-ultimate-guide-to-growth-marketing-explained-by-a-growth-hacker-720x317.png)
Subscribe to Dashly newsletter
Join the community of 13,000 pros who get expert insights on marketing, support, and sales in a weekly newsletter


